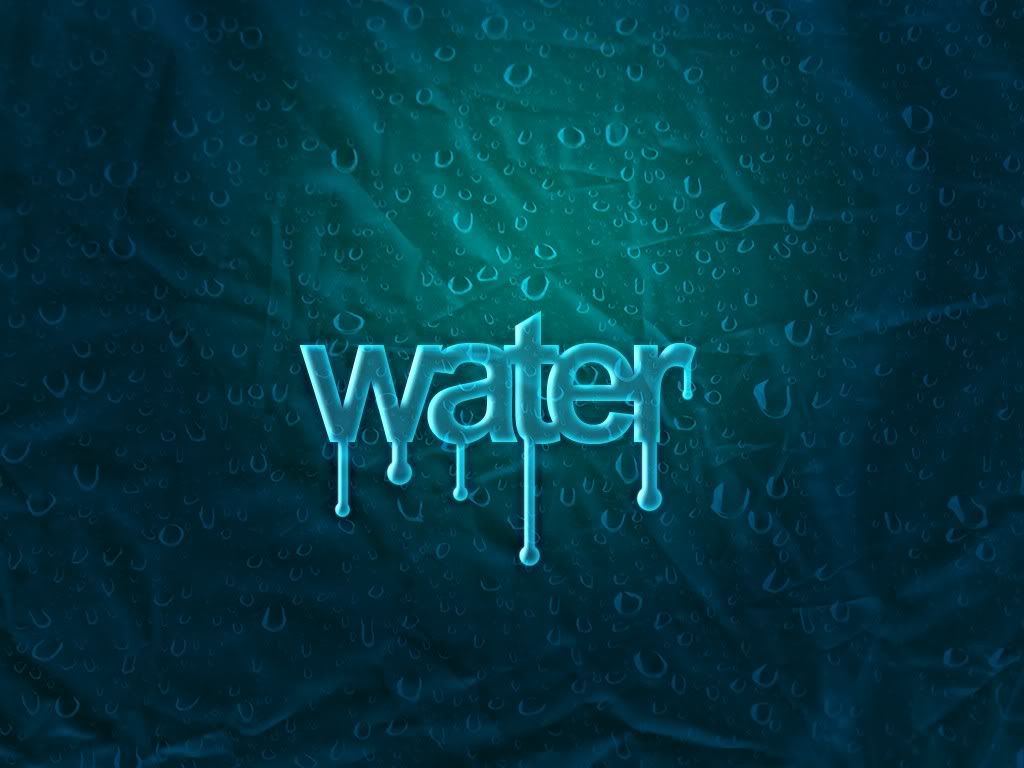
Hello everyone, in this Photoshop Tutorial, you’ll able find the easiest way to make a beautiful and glossy text effect using some basic resources and tools within Photoshop. So, let’s get started…
Tutorial skill: Advance
Software: Adobe Photoshop CS5 or higher (recommended)What you will need in this Tutorial (links are provided in the end of this tutorial):
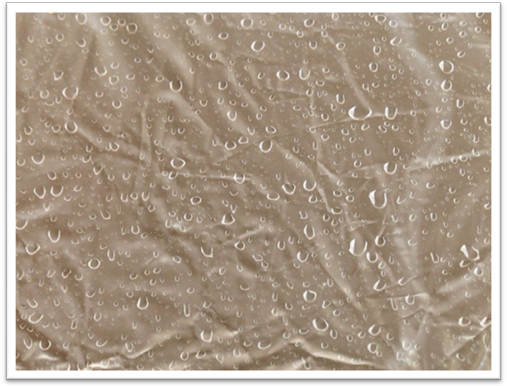
- Water Drop Texture (Image 2)
- Paper Texture
- Arial font (no need to worry about this, it gets pre-installed with Windows)
New File size: 1024 X 768 pixel
Resolution: 300 dpi
Color mode: RGB
Step 1
Place it on the New File (both textures should be placed in individual layer, and Paper Texture layer should above the Water Drop texture layer) and resize it with the document size (i.e. 1024 X 768).
Now, duplicate the Paper Texture layer and change the Blending mode to Exclusion (Paper Texture’s original layer) and Divide (Paper Texture’s duplicate layer).
Step 2
Now, make a new layer (name it as Spot Light) and fill it with white color.
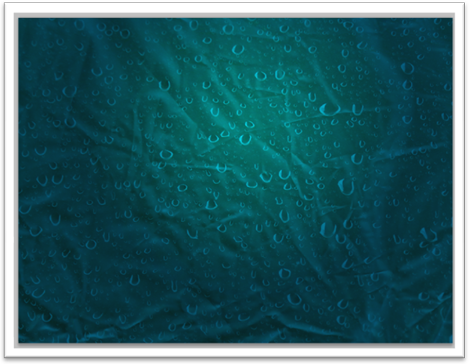
Interesting section of the tutorial, making the Spot Light look effect on the background.
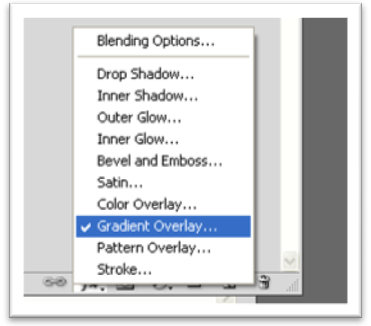
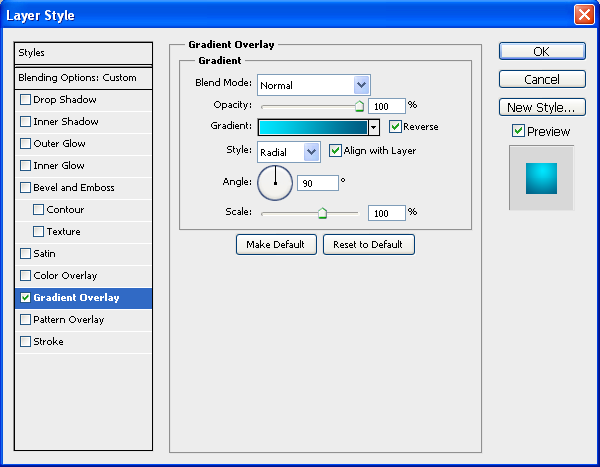
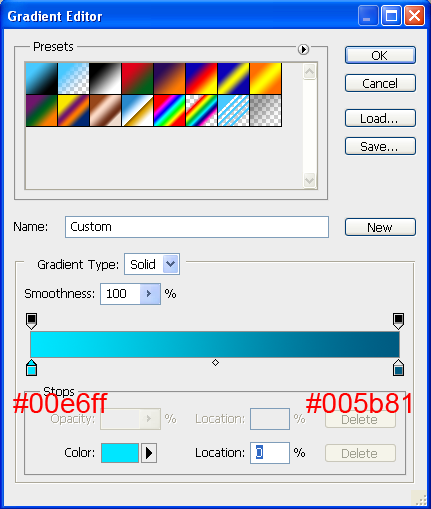
Go to Spot Light layer, and then apply the Gradient Overlay style on it.

Step 3
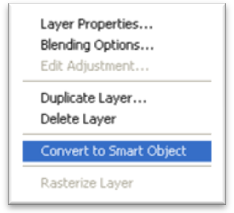
Now, convert the layer in to Smart Object and change the Blending mode to Multiply
Step 4
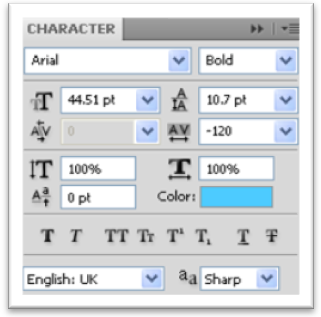
Now make a new layer above the all layers and select Type tool and type “water” in small letters. Apply #48c9ff color on the text. In this step, we will need to do a small modification on the Characters (i.e. water). Select the characters and go to Character palette and change the values as shown below:
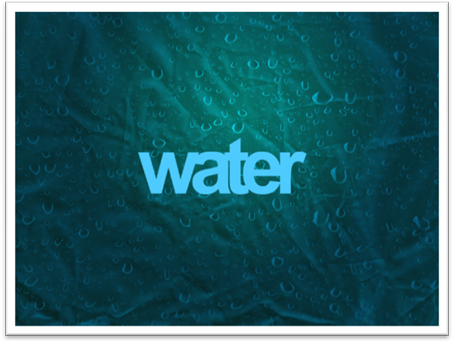
Now the time for the most important part of the tutorial.
To apply some beautiful layer styles on the “water” text layer.
Step 5
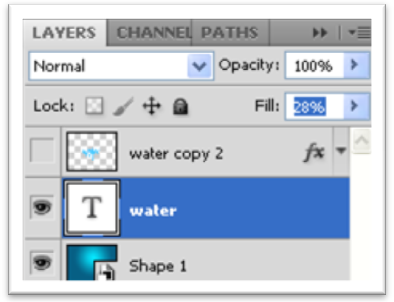
First, decrease the Fill Opacity of the text layer to 28%
Step 6
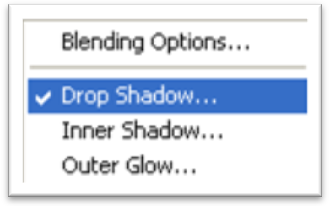
Now, the time for applying the first Layer Style, i.e. Drop Shadow, Go to Blending Option tab and select Drop Shadow as the layer style.
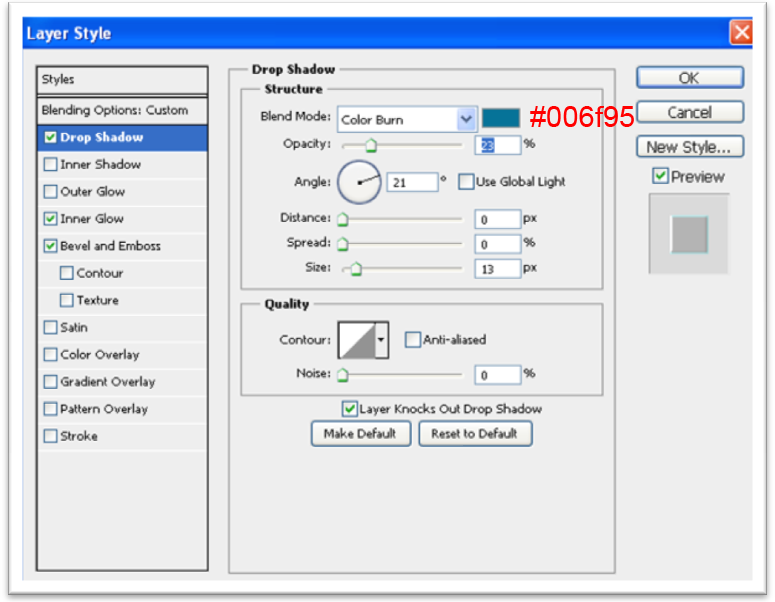
Now we’ll apply another three layer styles on the text layer, i.e. Inner Glow, Outer Glow and Bevel and Emboss.
Step 7
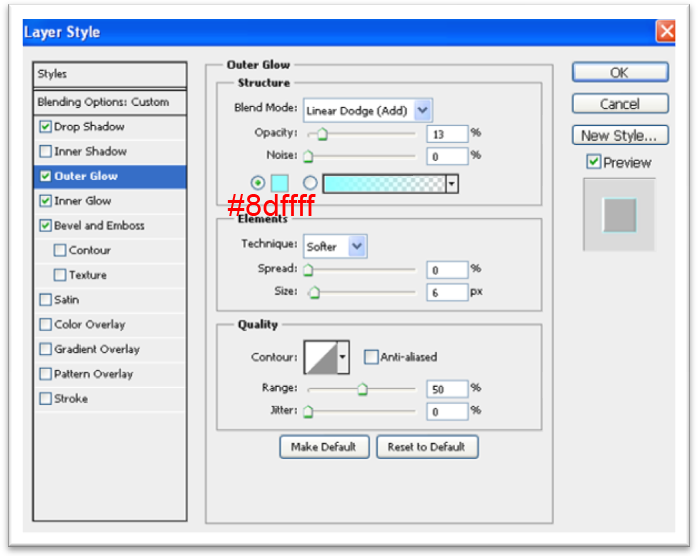
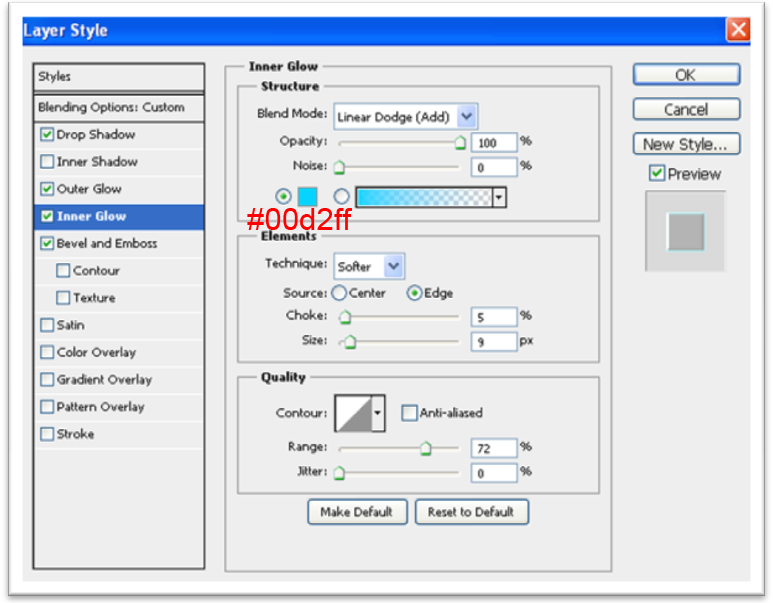
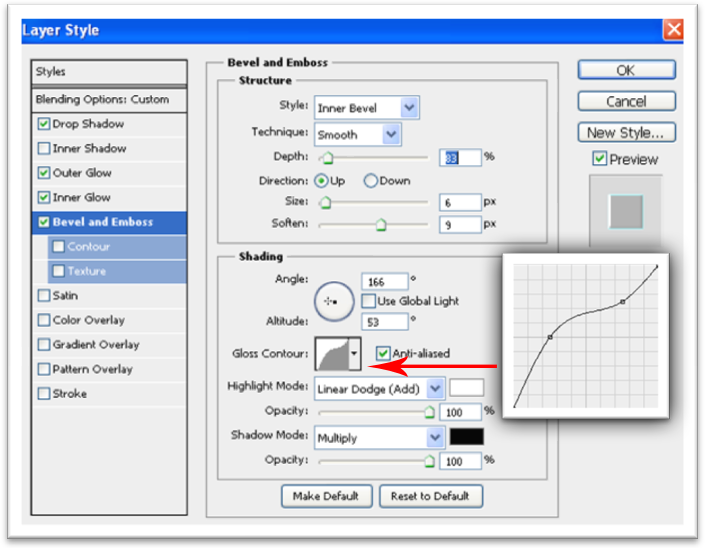
Well, almost we are done.
Here, we will add a little tricky thing again; the Flowing Water drops from the text.
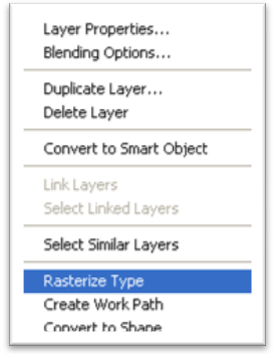
First, we need to Rasterize the text layer that we’ve created a moment ago.
Step 8
Now, pick up the Brush tool (size: 10px, hardness : 100%) and Zoom in to the Text layer (water). Draw a straight line by pressing Shift (60px length) from right below the “w”:
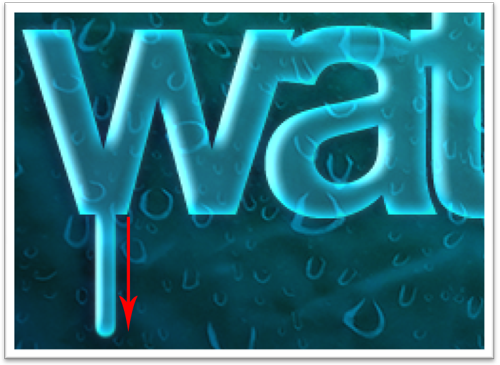
Than increase the brush size to 20px and click on the bottom of the line.

Almost done, now, repeat this method with the other letters to create a flowing water drop effect.